I started by cleaning the models up a bit which didn't take long as they were all clear, crisp castings with minimal flash.
I then glued them all onto coffee stirrers with superglue. I'm painting three stands each of eight models, 24 in total, so glued them six to a stick on four sticks to make it easier to paint them.
As these models are mostly armoured I sprayed them with black paint (Boyes).

They were then drybrushed all over with GW Chainmail and helmets and spear tips picked out.

From there I started on basic colours. Just aiming for neatness. And not worrying too much about bits that are hard to reach. At this scale if its hard to reach it'll be hard to see, so just let the black undercoat act as shadow.

Tallarn Flesh

Deneb Stone

Snakebite Leather


Scorched Brown Trousers

Bestial Brown Trousers

Yellow Shields and Red scabbards


I then went back and gave a few highlights to the cloth. Just a light flick with the brush tip in most cases.

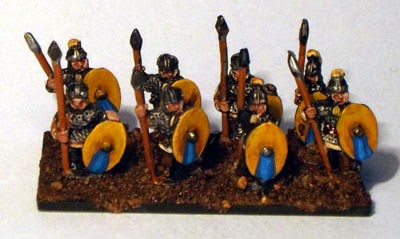
The shields are the focal point of the miniature. So I gave them some extra highlighting with Sunburst Yellow.
Then I painted on the design with Mordian Blue. Then a central highlight of enchanted blue and finally some Enchanted Blue mixed with Skull White

From there they were separated from the coffee stirrers and then glued to the Warmaster bases.

Next the base was covered with watered down PVA and dipped in sand

I then added some thinned Brown Ink to the base.
When that was dry I overbrushed with Vomit Brown.

And then drybrushed with Bleached Bone.


Big Close Up


Great post :)
ReplyDeleteI agree - by far the best tip for doing these little guys is an initial dry brush (of grey/brown/metal) over the black - it really picks out the detail. Yours look fab!
these look great
ReplyDeleteGreat work - I especially liked watching the transition from black to fully-sorted unit. The finished product is lovely.
ReplyDeleteBrilliant! They look fab! And you make it seem 'almost' easy...
ReplyDeleteVery nicely done that man :-)
ReplyDeleteJason.
They look awesome!! I'll be painting some of the same size and this was a nice primer on how to do it.
ReplyDeleteGreat step-by-step!
ReplyDeleteGreat step-by-step!
ReplyDelete