Terrain and forces were very much the same as in our previous game except that more British were painted (thanks to me painting them) and we didn’t have any Peninsular buildings to fight over (thanks to me forgetting them).
However some time had passed and we’d all had a sleep or two, so we felt like we’d forgotten most of the rules. Which led to some frantic page turning (or, in fact, frantic PDF scrolling on our electronic devices – modernity has gripped the Sherwood, Hucknall and Ilkeston Team).
The British, as is the way in our games so far got the jump on the French and deployed most of our forces first. General B pushed his regulars forward up the road and I sent the big group of regulars off on a flank march. Both of these moves proved unwise.

General Ballroom surveys the advance from a position of safety

Redcoats. Actually painted red this time.

Boney's warriors arrive
Suddenly Voltigeurs popped up in the wood in front of the good general’s men and unleashed a deadly hail of shot. Shock piled up on the redcoats and casualties began to mount.
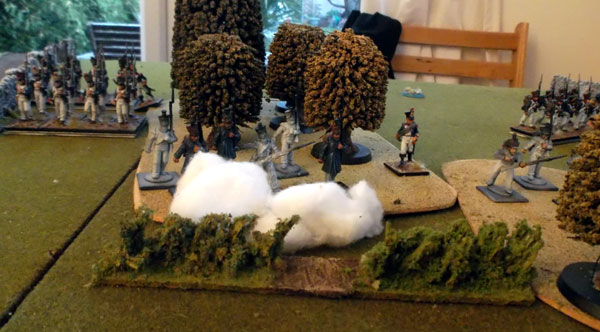
Sacre Bleu!

The shock begins to pile up!

Hang on, they look more gris than bleu, almost as if they're not fully painted...
Over on the right green jacketed rifles exchanged fire with a large group of French fusiliers and despite some initial success the French began to push forward, making the skirmishers retreat.
The British left flank soon had a French force lining a stone wall awaiting them, before a stumble by their commanding officer saw them halt in disarray for a time.
On the right the French charged forward and the rifles fled the field.
In the centre shock and casualties meant the Fench held sway too.

Give fire men!
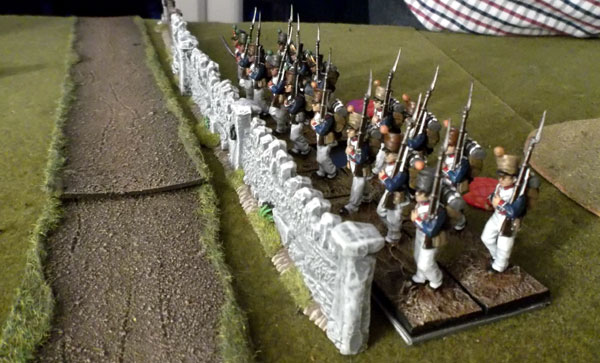
"Yeur cannort 'urt us. We are behind zis, ow you say, waerl."
At this point General B. declared himself ready for bed and so the battle drew to a halt with the French holding the field.
This was an Ok game.
It felt a bit, well, bitty and a lot of card turning and rulebook consulting to get not very far.
Some of this was down to us not knowing the rules (though on reading back the next day we’d actually played most of it right) and some of it is undoubtedly because we’ve not yet grasped the nuances of using the command cards. And some of it was down to us not being very good at soldiers and the rules being unforgiving of tactical ineptitude (advancing blind toward a wood, sending the core of your force off on a flank march).
I think we need to play more games and maybe think a bit harder about what we’re doing if we’re really going to get the most out of the rules.
Nice looking terrain and good to see your figures getting painted :-).
ReplyDeleteI see you have previously played SoDS how do you compare SP to the them?
SoDS are the rules I currently use for my Napoleonic skirmish games.
Hello Darling :)
DeleteSoDS and SP2 are quite different. SoDS is much smaller scale and SP2 is more about units (albeit small ones) than individuals. SP2 feels like the next step up in terms of scale and size of warfare - so try it when your SoDS force grows too big!
SP2 is probably a more realistic version of Napoleonic warfare than SoDS.
SoDS feels more like a "fun" rulesset and SP2 a more serious attempt to reflect the tactics and choices of black powder warfare.
I have to say that of the two I've enjoyed the games of SoDS more so far, but that may e more to do with the learning curve of the rules.
Tom
Thanks Tom!
DeleteRight, now I know the scaling I'll pass on the and stick with SoDS...
Cheers!