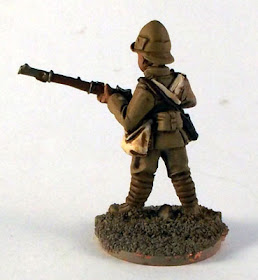
A lot of the paints I use are old OOP GW ones, but you should be able to find equivalents in any of the main paint ranges
The models are first based on pennies, with sand glued on using PVA.
Then the whole model is sprayed with Halfords Khaki spray
It gives a lovely even matt coverage.
Next I paint the flesh with Tallarn Flesh
Then the rifles and the chinstrap on the helmet are painted with Bestial Brown
Next all the straps and the haversack bag are painted with Skull White
Puttees are added using Graveyard Earth
Then the (controversial) water bottle and strap are painted with Scorched Brown
Metals along the rifle are added using Chainmail
Can't quite tell what I've done here, if anything. Anyway by this stage all the basic colours have been added.
Now the big thing. Give the whole model a wash with Coat D'Arms Mid Brown Superwash.
You could use Army Painter, Vallejo Sepia or whatever the GW equivalent of Gryphonne Sepia is these days. Or your own mixture based on floor polish, beeswax and the tears of baby panda bears. Basically use the medium brown wash of your preference. All over.
However having tried most of these I can thoroughly recommend the CDA version, it's cheap, flows and pools really well and is just the right shade for Khaki and flesh.
At this point add some black to the remaining pouches (two at the front, one on the rear) and the boots. And the bayonet sheath, though I think I forgot here and sneakily added it in later.
Now highlight the flesh with the base flesh colour (in my case Tallarn Flesh)
Then a second flesh highlight adding a little Elf Flesh to the Tallarn.
At this point I varnished the entire model with a coat of Purity Seal spray, followed by some Vallejo Matt varnish with a brush to remove the shine.
I then based the model with a wash of Ogryn Flesh (just to give a slightly reddish tinge to the Afghan sands) followed by a drybrush with Kommando Khaki and then Bleached Bone.
Finally the black pouches got a coat of gloss varnish.
And here's the finished model taken against a blue graduated background.
I really like this range and the sculpting style. They paint up really well and easily and give great results.
I also really like how the Coat D'Arms wash works.


Excellent work.
ReplyDeleteThanks Neil
DeleteTom
I use a of Halfords camo khaki..very useful stuff indeed! Thanks for the walk through and the tip about the CDA wash. I have a load of WW1 Turks to paint so may well try a similar approach. Great end result BTW.
ReplyDeleteI think it was your blog where I first heard about the Halfords sprays!
DeleteI've got all three, the green passes for WW2 armour and the Dark Brown is very useful as a base coat for all sorts of stuff.
Tom
Well you certainly made that look easy! Great tutorial Sir.
ReplyDeleteThe Dark Brown is especially good for really dark skins - used it for all my zulus...
ReplyDeleteExcellent job on the figures
Indeed, used it extensively on my DA natives.
DeleteTom